18
Sep
Posted By Avonlea Kitchen + Bathroom Concepts
Key Guidelines for Framing a House
When building a home from scratch, the first step is planning and preparation. Then comes excavation and building the foundation, creating the footings, waterproofing, drainage and other steps. Utility line installations for water, septic, electricity, internet, gas, and other lines also occur at this stage.
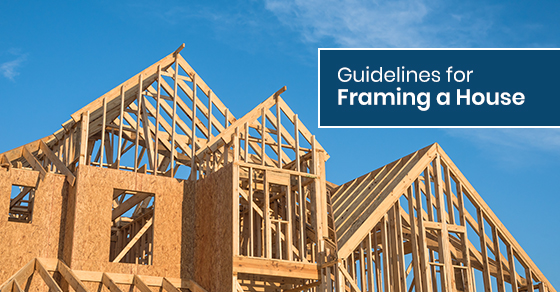
It is then time for framing. This is the stage where the skeleton of the home takes shape. During framing, you can really begin to see what the house will look like when complete. There are many options available when it comes to finding a framing solution, and at Avonlea Kitchen and Bathroom Concepts we will work together to find that perfect solution for you.
What is Framing?
The framing is the vertical and horizontal components of exterior walls and interior partitions. Referred to as studs, wall plates and lintels, these components support the roof, upper floors, and the ceiling. They serve as a nailing base for all covering material. The framing also paves the way for the flooring, roof, doors, and windows.
Wood is the quintessential material for framing, but metal framing is popular as well. In some areas, steel framing is called for by code regulation. Always consult your local building authorities as to construction regulations for framing. It is your responsibility to obtain any construction permits needed. Once done, you can begin erecting the framing as follows.
Mark the Layout
Marking the layout of the floor plan is very important. The lines represent where the bottom plates of the walls are to be placed. Typical building codes call for framing walls to consist of a 2×4 top-plate and bottom-plate and 2×4 studs at 16 inches on centre.
Erect the Frames
Each wall is constructed individually and laid out flat in its proper position. The rough openings for the windows and doors should be included in the walls at this stage. The walls are then lifted upright into place, measured to be made plumb, and nailed together.
Install the Joists
The joists must be cut to lay flush with the outer surface of the exterior walls and laid out along the top plates of the upright walls. Joists can range in size from 2×6 inches to 2×12 inches. The joists are typically nailed on edge to the top plates at 16 inches on centre, spanning the entire width of the house. For homes with a second storey, the joists will work double duty as both ceiling joists for the first floor and floor joists for the second floor. When used as floor joists, a layer of plywood decking is affixed atop of these upright joists.
Install the Ridge Board and Roof Rafters
Rafters can range in size from 2×6 inches to 2×12 inches. Depending on your roof configuration the components will be cut and assembled in a specific way. The ridge board, typically 2×12, will be installed first. Then pre-cut rafters will be nailed in place at the ridge and at the plate. The notched lower ends of the rafters sit on the top-plates alongside each joist. The lower ends are designed to extend past the exterior wall to create an overhang.
The top part of each rafter is attached to the ridge board, which forms the peak of the roof. The pitch of the roof is determined by the angle of the cut at the ridge end and at the notch. A roof that angles upwards vertically 6 inches for every 12 inches measured horizontally is said to have a 6-inch pitch. The rafters, studs, and joists are aligned in such a way that a continuous load path is directed towards the ground.
Avoid Deflection to Prevent Squeaky Floors
Deflection is the sinking and bending that results from applied weight, which is also known as loading. Deflection can cause squeaking at spots where wood meets joist as someone walks overtop. This can be remedied by adding a bit of silicone to the bottom and sides of the joist hangers prior to installation.
Centring is Important
The usual stud layout for pulling a measurement across the face of a top and bottom plate is 16” on center. Yet when the measurements get pulled, marking on each 16” increment will result in an off centre layout. When a piece of plywood, sheetrock or other panel is attached to the studs, it will be off at the point where the stud breaks with the edge of the board. The solution is to set the layout ¾” behind the actual 16” increment. This will move the studs over by a margin that will precisely account for the next piece of plywood or sheetrock to break perfectly on a stud.
Top and Bottom Plates
When there are multiple walls to frame up, mistakes can occur with the top and bottom plates being cut to an incorrect length, causing a great waste of materials and adding to overall construction costs. The most effective method for ensuring the top and bottom plates are a consistent length is to first lay everything out on the ground. Drawing a chalk outline is a great way to begin. Also include measurements for the door openings, header, and angles. Then when it’s time to cut the top and bottom plates, you can place the plates atop the floor layout to check that you have accurate cuts every time.
Load-Bearing Walls
Unlike interior walls, which are not structural in nature but simply used for dividing up the interior space into rooms and areas, bearing walls are incredibly important because they carry all of the weight of the roof.
Yet it is often the case that the layout underneath bearing walls is off-measurement slightly. To install and maintain a good layout to support bearing walls, simply copy the placement of the truss, joists, and rafters from above. In every location where a rafter bears onto a wall, place a stud directly underneath. In spots where hips, girders and other heavy duty trusses are located, doubling or tripling up the studs to accept the load is an effective method.
For more information about framing, please call Avonlea Kitchen and Bathroom Concepts at (416) 907-7891 or contact us here.
Leave a Comment
The comments are closed.